How does HealthEmove work?
This video shows you how to best use the app
The application will give a person ownership of and access to:
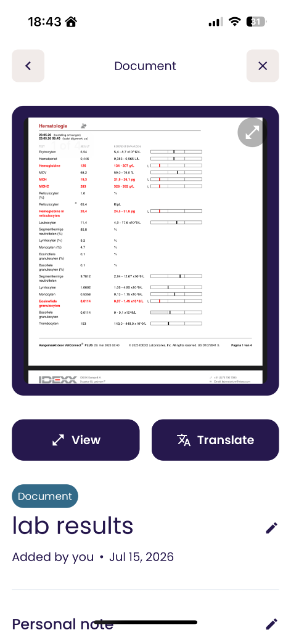
Photos of documents
Medication
Diagnosis
Information
This page shows you how to use the app, step by step.
Step 1 — Create an account
You only need an email address. The account is free.
New to HealthEmove?
- Tap Create my health record.
- Follow the steps on the screen.
- Read the terms and conditions before you agree.
Already have an account?
- Tap Log in.
- Open your email. You will find a code there.
- Enter the code in the app.
💡 Tip: No code in your email? Look in your spam folder.
Step 2 — Add your personal details
- Tap the ♥ heart icon
- Tap You.
- Tap Edit overview.
- Add your name or nickname, your date of birth, and a person to contact in an emergency.
You can also add important health information:
- Diagnoses — illnesses or conditions you have
- Medication — the medicines you take
- Allergies and vaccinations
Add as many items as you need. Anything else you want to keep? Type it or record it under Other information.
Step 3 — Add your medical documents
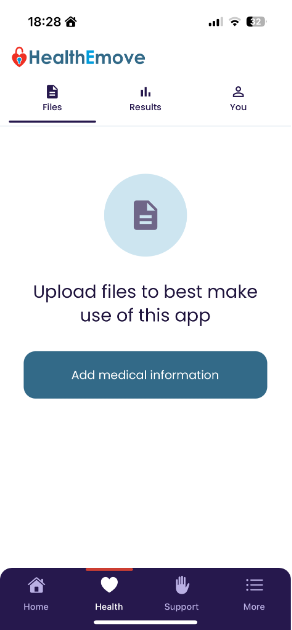
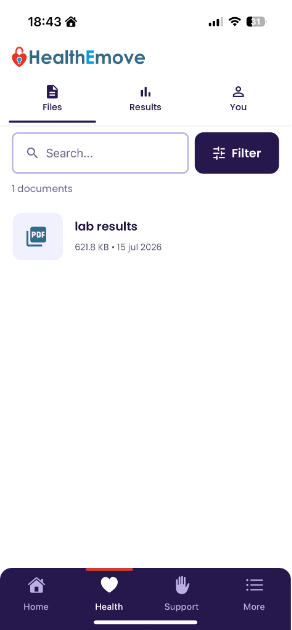
- Tap the ♥ heart icon and choose Files.
- Tap Add medical information.
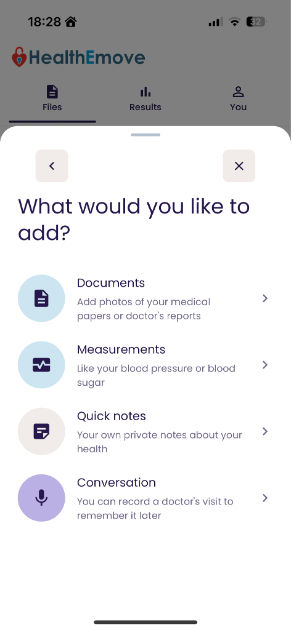
- Choose Documents.
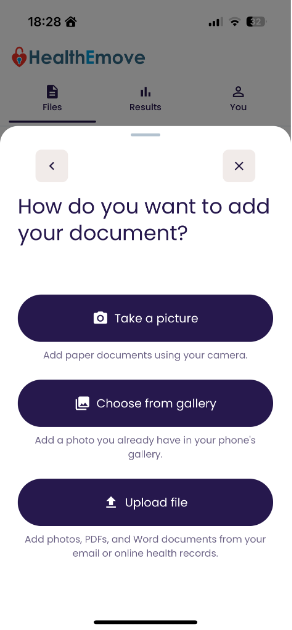
You can add a document in 3 ways:
- Take a picture: photograph a paper document, or a screen at your healthcare provider’s office.
- Choose from gallery: use a photo that is already on your phone.
- Upload file: add a PDF, Word file or other file.
Keep your photos private: Take the photo inside the HealthEmove app when you can. Then it is stored safely in the app, not in your phone’s gallery. Did you upload a photo from your gallery? Delete it from your phone afterwards.
Step 4 — Translate your documents
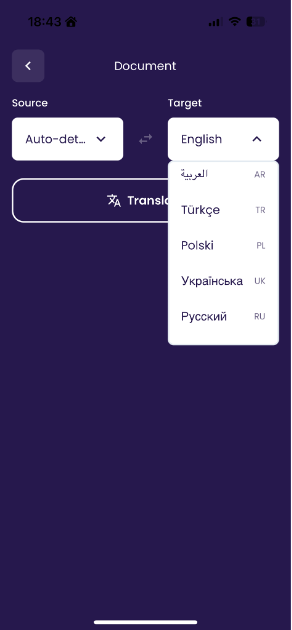
HealthEmove can translate your documents into more than 18 languages. This helps you understand your health information, or share it with a healthcare provider who speaks another language.
- Open the document you want to translate.
- Tap Translate.
Step 4 — Translate your documents
- The app finds the original language by itself.
- Choose the language you want.
Good to know: Translation works with PDFs, uploaded files, and photos of documents.
Step 5 — Track your health measurements
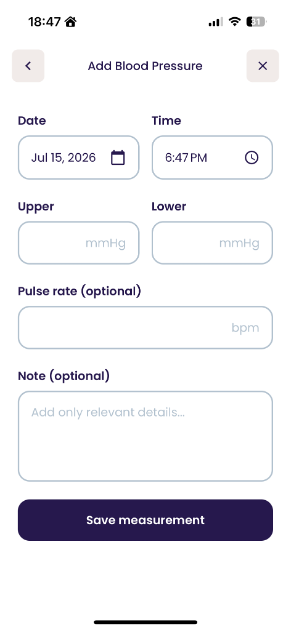
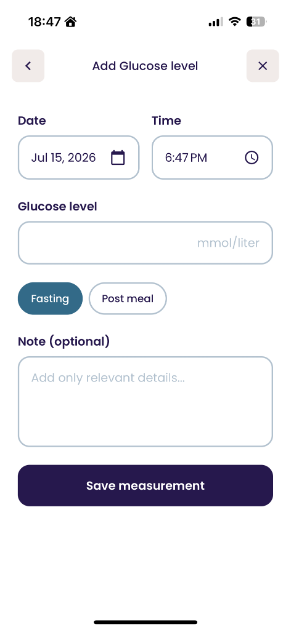
Keep track of your blood pressure and blood sugar (glucose) in one place. This makes it easy to see changes over time and to show them to your healthcare provider.
- Tap the ♥ heart icon and choose Results.
- Tap Add medical information.
Step 5 — Track your health measurements
- Choose the type of measurement, for example blood pressure or glucose.
- Add the date and time. You can also add a short note.
Step 6 — Write quick notes
Write or speak short notes about your health. The app can turn your voice into text.
Quick notes help you remember, for example:
- When a pain started, and how bad it was
- Questions for your next doctor’s visit
💡 Tip: You can add photos to a note. For example of a rash, a wound, or your medicine.
Step 7 — Record conversations
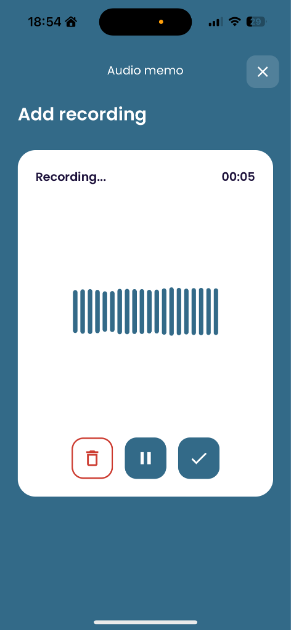
Record important talks with your doctor or nurse, so you can listen again later. This helps when you get a lot of information in one visit.
❗ Ask first. Tell the other person that you want to record. The app also reminds you of this before you start.
Step 7 — Record conversations
- Record the conversation.
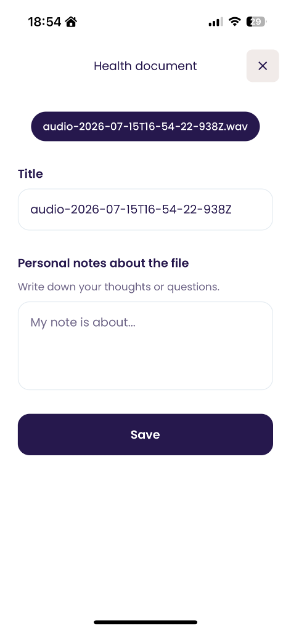
- Give the recording a clear title. You can add a note, so you find it back easily.
Step 7 — Record conversations
Translate a recording: You can translate recordings into more than 18 languages. The app first turns the spoken words into text, and then translates the text.